Sunday, December 29, 2019

Soil Sample Collection for Testing

After having cattle on the property, I became very aware of the importance of quality grass for the cattle to eat.  My property has very little grass and is more overrun with weeds.  I believe it is in some part due to all the bulldozer work in years past along the fence lines which disturbed all the top soil and opened the door for weeds to take over.  This is something I'd like to address especially on the west side of my property which grows over each year with head high weeds.

Today, I decided to start with a few soil samples to submit for testing.  I decided I'd create one sample from various places in the homesite area, a second sample from various places on the north fence line, a third sample from various places on the west fence line were it is so overgrown, and then a final sample from a few places around the tank.  The sample from around the tank is more for potentially adding a deer food plot.

There are other options available to get your soil tested.  I've been reading the GameKeeper magazine a bit lately and read up on their soil testing process.  Mossy Oak charges $7.50 per sample and will provide you with the basic results and will also indicate what products they have which would be fitting for a deer food plot.  I purchased four soil samples from them today and will be sending in the paperwork and samples this coming week.  I'll update with the results once they are in.


Mossy Oak Biologic Soil Testing

https://www.plantbiologic.com/pages/soil-testing-food-plot

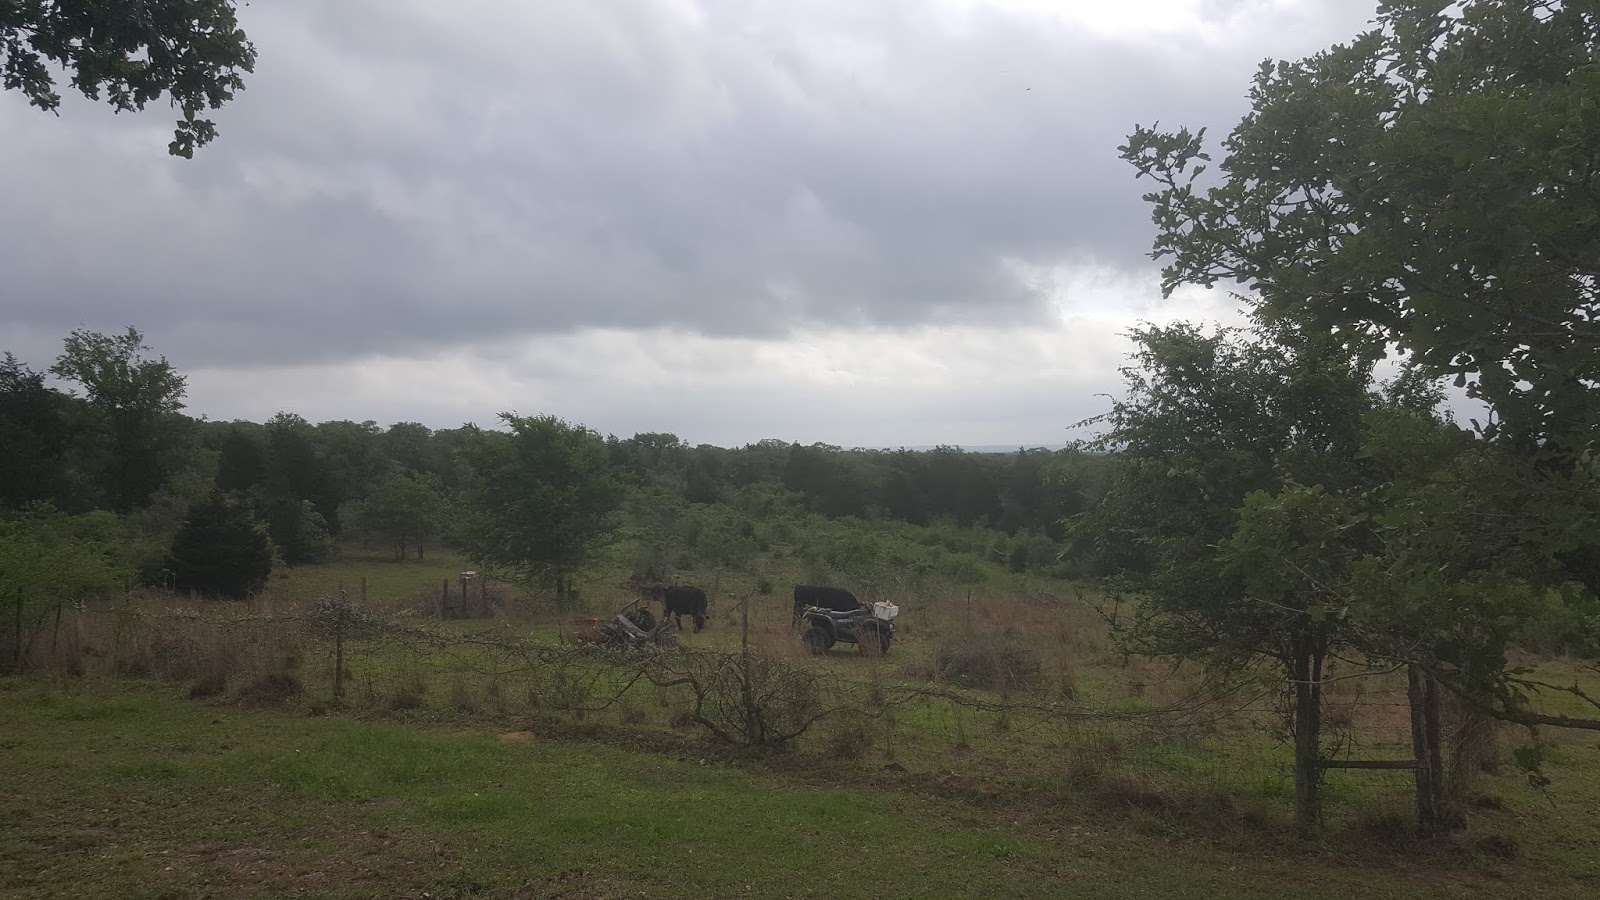
I took pictures of every place where I collected a sample.  It took just a few seconds more at each site but then I would remember exactly where I tested and where I did not.  Here are the pictures from the area that I'm referring to as the home site.


Friday, November 29, 2019

Small Fence Around Deer Feeder

I generally do not run the corn feeder on my 30 acre piece of property.  There are far more hogs than deer and without a fence around the feeder, I end up just creating a reason for the nuisance hogs to stay on my place.  Today, I decided to cut down some extra cattle panels to make a small pen around the feeder allowing me to run the feeder without attracting hogs.

I cut almost three full horizontal bars off the cattle panels leaving me with a 32" panel which is about the same as a regular hog panel (34").  I had five full 16' panels plus a small 5' section that I used as a gate to enter to fill the feeder.  I used eleven 5' t-posts to anchor it to the ground.  Overall, it took a bit over an hour to setup after I cut the panels down to size.

I put up my game camera in hopes of getting a few pictures of deer.  This will help to see what deer frequent the area.  I'm in the process of switching my property tax status from cattle (Agriculture Exemption) to a Wildlife Management Exemption.  As part of this process, I will need to submit counts on the number of deer on my property each year and this will help that process.


Saturday, September 7, 2019

DR Field and Brush Mower Maintenance

I purchased a used DR pull behind field and brush mower about two years ago to maintain the land.  The first few uses it worked without any trouble.  However, the second year of use I struggled with the mower not wanting to stay running and it would often die when I attempted to engage the blades.  

I initially thought the problem was caused by the fuel filter so I replaced the fuel filter in September 2018 but found it made no difference.  

In December 2018, I removed the carburetor and cleaned it up but did not replace any of the components.  Inside the fuel bowl, I found orange colored residue which I assumed to have been bad fuel.  I reinstalled it with a new air filter but still had the same troubles.


In April 2019, I managed to get the mower to work a little by keeping it on choke.  It would still die when I was going up a hill or over anything thick.  However, I was able to mow a section of the property.  In the process, I noticed the engine did not want to start with the key and it appeared the actual starter switch (made of plastic) was worn out.


In August 2019, I installed a new starter switch and found the mower would still not start using the switch.  At this time, I noticed the starter solenoid was also cracked and would not work.  I started it manually by bypassing the solenoid but it would not continue to run or allow the blades to be turned on without killing the engine.


September 7th, 2019 - I replaced all the fuel lines with 1/4" line, installed a new fuel filter, replaced the starter solenoid, drained the fuel tank, and then washed out the tank with B-12 before adding fresh fuel.  I was then able to get the engine to start and it ran better.  However, if I tried to turn on the mower blades it would die.  It seems the fuel filter is not filling much at all with fuel (like at all).

September 21st, 2019 - This weekend I changed the oil and put on a new oil filter.  I found a replacement gas cap which fit the tank and installed it, and then I started work on the fuel pump.  The job was not bad but once I was done, I started it four times with starter fluid and it would not continue to run.  I probably could have tried a few more times but I think something must be up with the carburetor.  I hate to just keep throwing money at it but I don't know what is wrong and at this point, it seems it must be the carb as everything else has been replaced.

At this point, the time shown on the mower is 68.8 hours. 


October 4th, 2019 - This weekend I rebuilt the carb by soaking it in B12 then replacing the float bowl, float bowl gaskets, needle, and each of the gaskets to install it.  I plan to install it along with two new spark plugs this coming weekend.  Hopefully, this will get it running as I've replaced the entire fuel system now minus the carb which has been rebuilt.


This time, the float bowl has a large number of black flakes inside.  I'm not sure what this is but a guess is the it is part of the deteriorating fuel lines that I just replaced.  


Parts Listing (Alphabetical Order)

Air Filter - Kawasaki 11013-7031

Fuel Filter - Kohler 25 050 22-S (currently using APE Racing replacement)

Fuel Hose - 1/4" Diameter

Fuel Pump - DR 49040-0769

Drive Belt - DR 221331

Oil Filter - Fram TG4967

Spark Plug - Champion RCJ-8Y

Starter Solenoid - QuickCar Products 50-430

Sunday, August 18, 2019

Garden Fence - Removing Rocks

As the garden was used in years past, it seems any rocks encountered were tossed along the edge of the fence.  With the fence now removed, there were piles of rocks all around where it once stood.  Today, I worked on moving these so that I can ultimately flatten out the land.


I gathered two large loads of rocks from around the garden.  I imagine there are more rocks in the piles of dirt which essentially ran along the bottom of the fence.  I assume as they worked the land the rocks were thrown by the fence out of the way and then might have been covered with dirt when the garden was tilled.  I'm not sure but it essentially left an 8" mount of dirt and rocks around the perimeter.  


I'm not exactly sure of what to do with all the rocks.  The property is at the top of a hill and there is no shortage of rocks.  My understanding is that the clearings on the property were made will a bulldozer many years ago.  There are piles of rocks that I believe exist from that process.  I added the rocks to one of the existing piles near the tank.  I'm afraid I'm essentially making a snake den but I guess it was already on the path to being one anyway.  

With the rocks removed, the only task left with the garden is to level the land.  I'll work out use of a machine to help with this as it will be quite a bit of dirt to move.


Monday, August 5, 2019

Front Gate - Fencing Attachment Pole

The picture below is of the attachment point for the field fence once it reaches a gate.  The approach is nice as it keeps you from wrapping the ends of the field fence around the pole where the gate opens and closes.  I plan to mimic this as I expand the original fence to form a fence around the home site area.
  

There are two stand off pieces which are roughly 2" x 2" x 1/4"


The rod is around 52" tall and is 3/4" in diameter.  I'll have to pick these up at a steel supply company.  My planning shows that I will need to add nine of these two the fence when my plan is complete.  I'll need quite a bit of the pipe as well.  


Sunday, August 4, 2019

Identifying Weeds

Texas Goatweed / Wooly Croton / Dove Weed
Killed by Grazon Next HL & Chaparral (1.5 - 2 oz per acre)

This grows quite commonly on our property and is known to grow in sandy soil.  They grow 1 to 3 foot tall have have a greyish green color.  The buds are eaten by quail, morning doves,and turkeys.


Western Ragweed
Killed by Grazon Next HL & Chaparral (2-2.5 oz per acre)

These grow one to six foot tall on disturbed sites, dry rangeland, and hillsides.  All three of these describe the area of our property which is almost covered with this weed.  They spread through tillers which branch out from the parent plan.  They serve as decent food for wildlife but not for livestock.


Broomweed
Killed by Grazon Next HL & Chaparral (1-1.5oz per acre)

These grow fairly commonly on the property and have a single stalk with a round top.  It is often covered with little yellow flowers from September to November.  The plan grows 15" to 30" tall.  The plan is poor grazing for livestock or wildlife.  Grows in heavy clay or disturbed areas.


Beggers Lice


GrazonNext HL 

To apply, got with 1.5 to 2 pints per acre for most areas.  You can buy 2 gallons on Amazon for $100 which is 16 pints.  You can then treat roughly 8 acres for $100.

It is recommended you add a high quality non-ionic surfactent (of at least 80% active ingredient) at .25 to .5% volume (1 to 2 quarts per 100 gallons of spray.  

Chaparral 

This stuff is more expensive and cost about $160 for 1.25 lbs (volume isn't listed).  You use 1.5 to 3 ounces per acre which is quite small.  This is suppose to be better than GrazonNext HL as it kills more items.  However, I guess you need to need to kill something that only Chaparral kills in order to make it worth it.  

Saturday, August 3, 2019

Garden Fence Clearing - Part 4

While my pictures are not great of the progress today, I removed the remaining sections of fence.  In the picture below, the fence ran just below the tree in the lower left and then to the white shed before turning back to the left.  I removed the two corners and entire side this morning.  


The fence is now entirely removed....


After removing everything, I started the clean up process by rolling or folding up the removed sections of fencing.  


There are some newer fence posts which were on the side by the shed and older cedar posts from the remainder of the fence.  I drove  around loading it all up on the trailer.


I cut up all the cedar posts as they are old and I don't really have use for them.  While they are not great fire wood, I'll likely give them to our old Boy Scout Troop as they can certainly use it for fires in the evening this fall and this stuff is certainly dry.


Our city has a bulk trash and recycling program.  I was going to take the fence to the recycling center myself for the cash but would have only received about $3 and was just too beat.  I left it out and let the city handle the job for me.


The only task left is to remove the larger rocks from where the garden fence once stood.  It is not something I need to do immediately but I expect to handle that task in the coming weeks.

Saturday, July 27, 2019

Brush Burning Progress

When I started the project of removing the fence, I began burning a brush pile that was in the garden.  I burned all the small items in the garden area and moved to the following pile which was created a little over a year ago.


Over the last few weeks, I've burned this pile down to almost nothing.

I'll need to finish burning this before long along with the larger pieces which are still in the garden.

Saturday, July 20, 2019

Garden Fence Clearing - Part 3

Today I continued the long task of removing the garden fence.  The job is made especially difficult by the Texas heat.  It is now near 100 each day with high humidity.  I start early in the morning and end up completely beat by around 1 or 2 o'clock.

I removed the section of fence on the side of the garden which is closest to the cabin.  It was not very hard to remove but there was a large grape vine growing over it which took some time to remove first.  As you can see below, I rounded the corner to the right removing all the corner fencing which was left from my first weekend of work.  However, I did not get to removing those corner fence posts before calling it a day.

Before:


After:


The areas is starting to look much better already without the garden.  There are large berms of dirt where the garden fence was once located.  It seems they threw all the rocks along the fence while using the garden so removing the rocks and leveling the dirt will be a project for later.  I've probably got one weekend left to remove the left side of the fence in the picture below which runs behind the shed and down the left side of the garden.


Saturday, June 29, 2019

Garden Fence Clearing - Part 2

I continued work removing the fence around the garden today.  Last time, I removed some of the fencing on the south side of the garden.  I picked up where I left of on the south side but then moved around and removed a bit of the west side of the fence.  While working on the fence, I've been burning a nearby brush pile which slows progress but is also something I need to do.

Before (fence to right of 4 wheeler):

After

After a bit of clean up:


Monday, April 29, 2019

Garden Fence Clearing - Part 1

One of my plans for the coming year is to remove the garden area created by the former owner.  The longer term goal is to create a large flat grassy area.  This area will then be fenced in long term as part of the home site.

To make this happen, I need to remove all the fencing and posts, burn the wood piles in the garden, and remove the rocks and dirt piled along the fence line.  Longer term, I will add the fence which will delineate the home site from the rest of the property.


I started the process a few weeks back by removing near thirty 8' tall t-posts placed around the perimeter.  These t-posts were not connected to the existing fence.  The previous owner added these t-posts so he could install taller fencing to keep deer out but I suppose that never occurred or it was removed as the top run of fencing was not in place when we purchased the property.

The picture above shows the t-posts before removal and below is as of the start of the day today.


I used an old water tough as a burn pit and was able to burn the two small burn piles leaving only the pile of very large stumps left to burn.  I also remove a bit of the fencing but that was more to use the t-posts for a different project.  


While not entirely related, I did take some time today to remove some barb wire that was run by the previous owner to separate the two tracts of land.  It was run many years ago and was not too hard to remove as it was rather rusty and there were only two strands running about 100'.